
5 Fundamental ‘Rules’ of Composition to Improve Your Landscape Photography
Composition is, without doubt, one of the most important aspects of landscape photography.
Alongside light, it is the key ingredient to creating a compelling photograph. Without a strong composition, an image will appear flat and lifeless. But, with a powerful and calculated composition, a photograph will grab attention and hold a viewer’s gaze for longer than a fleeting, momentary glance.
When I first picked up the camera to begin my journey into landscape and Nature photography, I had no idea that I was holding something far more powerful than a tool for taking a pretty picture of a time or place. For a long time, I thought composition was about simply pointing the camera at something beautiful and pressing the shutter button. How wrong I was.
What I have discovered, through countless hours wandering the hills and valleys and ancient woodlands of Wales with my camera, is that landscape photography composition is the difference between taking a quick ‘snap’ of a mountain to show your friends on social media and creating a timeless story of the landscape that stops people in their tracks, makes them pause and reflect, and whispers a profound message that awakens their soul.
If you’re just beginning on your landscape photography journey, you might be feeling overwhelmed by all of the technical advice out there. F-numbers, ISO settings, hyperfocal distances — yes, these do matter, of course, but you have to be careful not to get too lost in the numbers when starting out as a beginner in landscape & Nature photography. I wish someone had been there to tell me, when I was at the start of my creative journey, that the secret to transforming ordinary scenes into extraordinary photographs is composition, regardless of whether you’re shooting with the latest full-frame, mirrorless camera or your smartphone.
The truth is, landscape photography isn’t about having the most expensive cameras and lenses or understanding the formulas to create the perfectly exposed photograph. It is about learning to see again through new eyes whilst in the landscape. It’s about recognising the beauty that is unfolding before us and understanding intuitively how to arrange each of the elements within the frame in a way that guides the viewer’s eyes, awakens an emotion, and tells a story that resonates long after they have looked away from the photograph.
In this guide, I’m going to share with you all the fundamental composition ‘rules’ and techniques that have shaped my approach to creating landscape photographs over the years — the same principles I teach in my photography workshops and mentoring sessions. These aren’t rigid rules to follow blindly and unconsciously, but rather gentle nudges to help you develop your own way of creating and to awaken the artist within you that understands when the rules must be broken in the name of truth and authenticity. This guide will give you the foundation you need to create not just technically sound photographs, but rather, emotionally compelling stories.
Your camera has given you a voice. Now let’s make sure the world truly hears what your soul has to say.
The Rule of Thirds
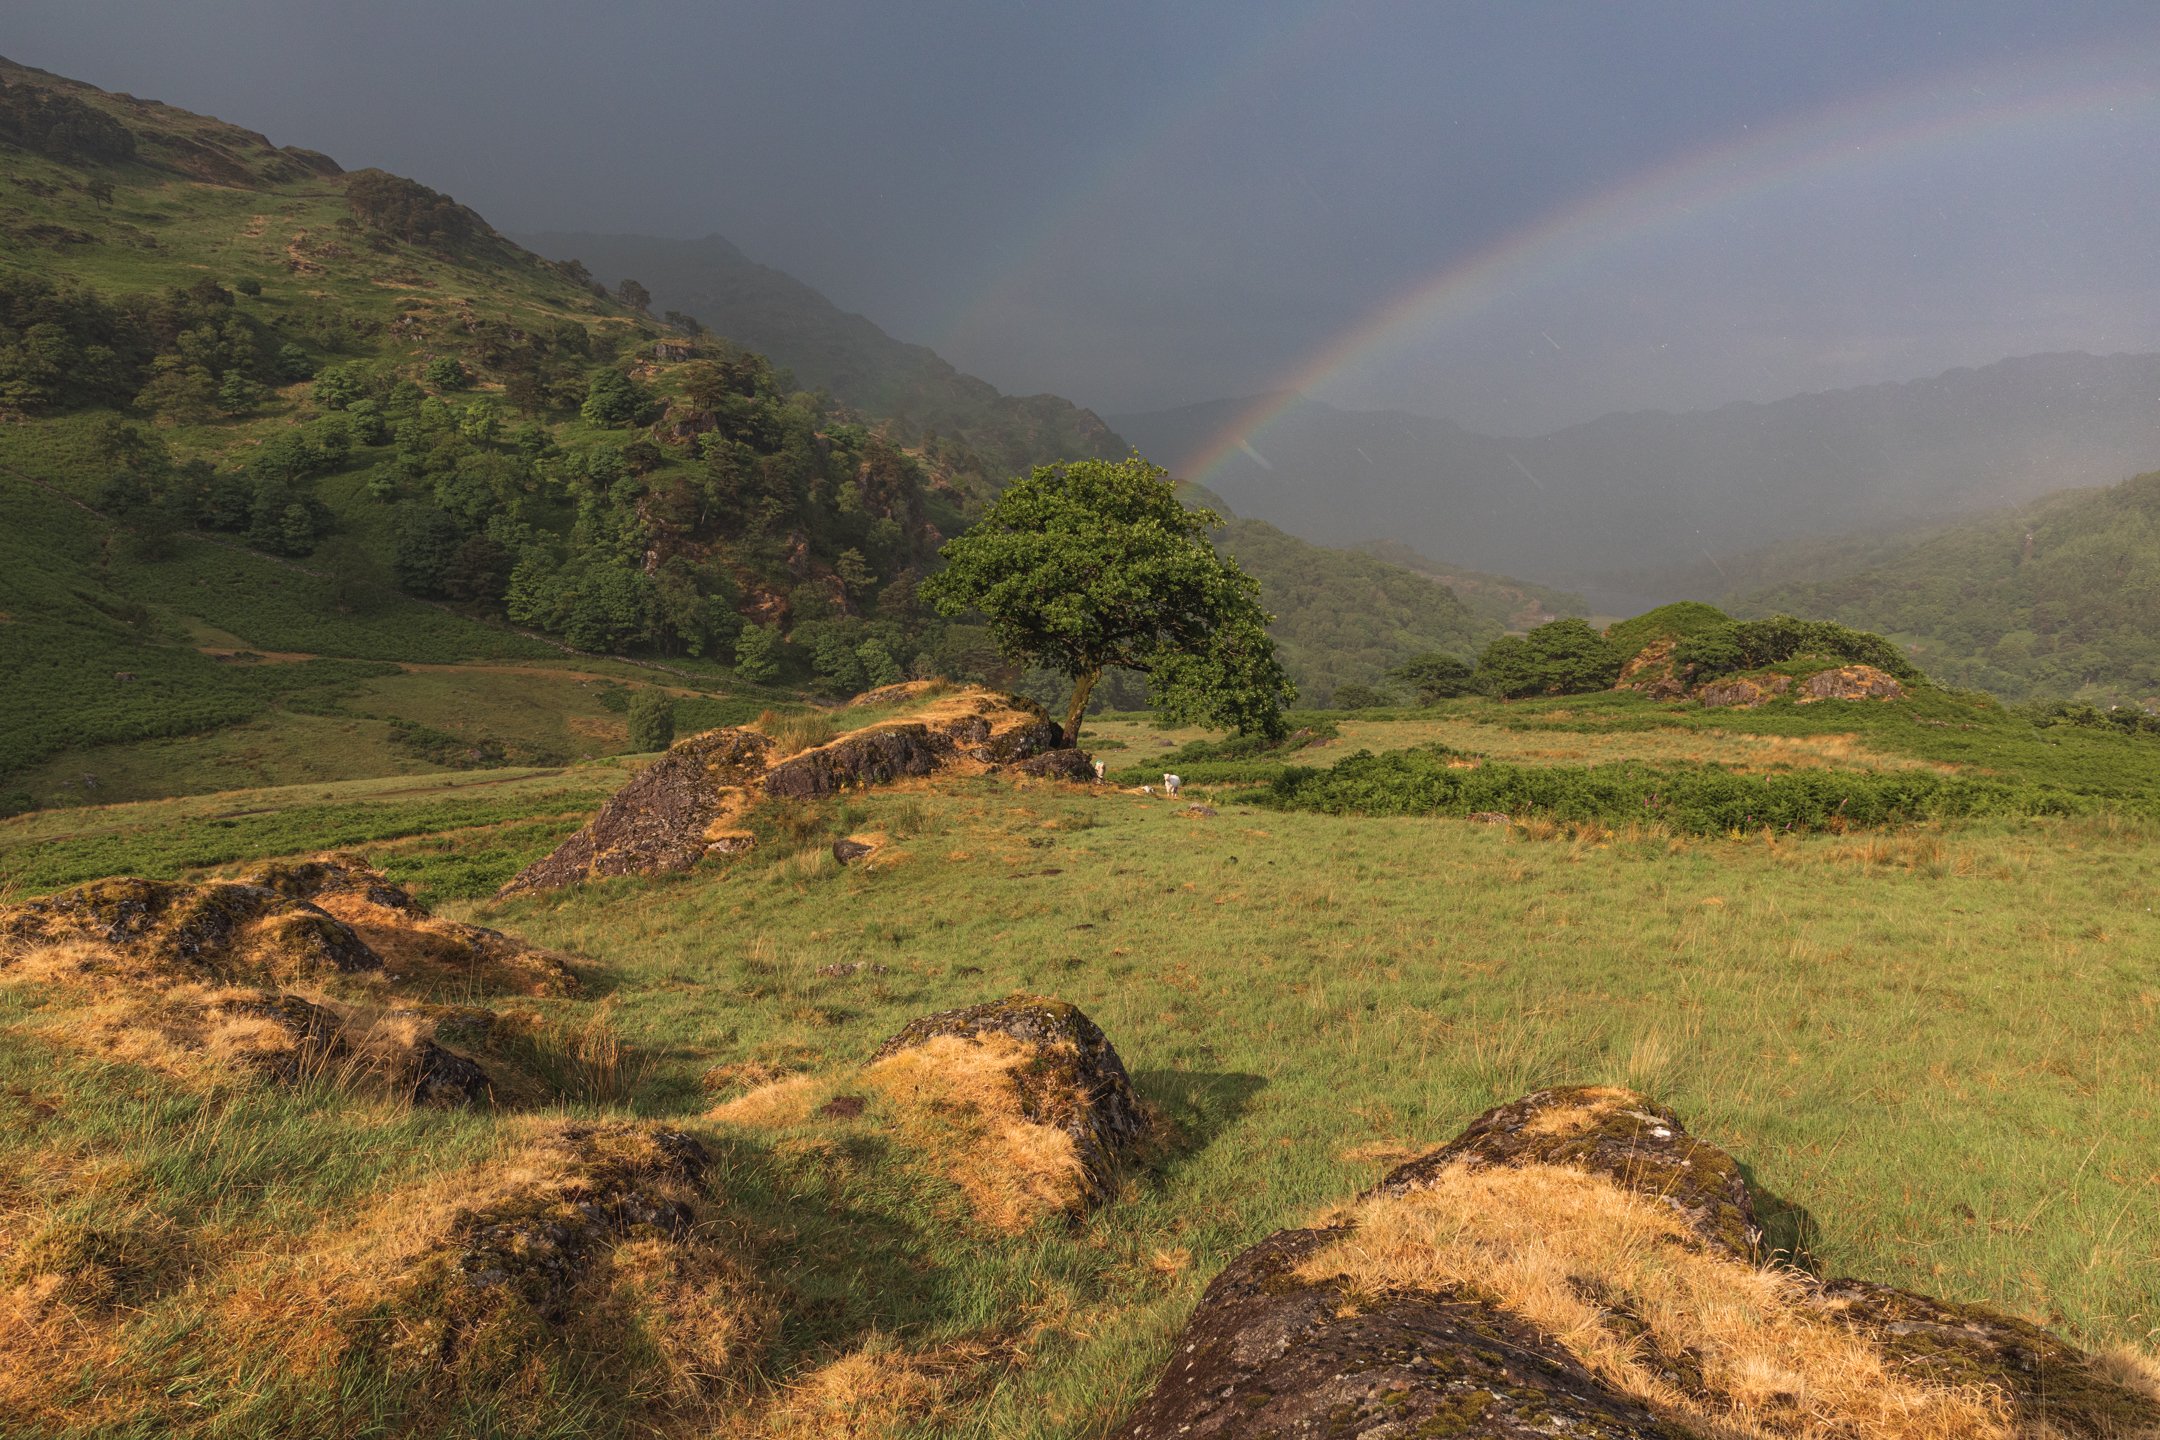
The rule of thirds is one of the first ‘rules’ of photography that you will want to build an understanding of. This suggests that you divide your frame into nine equal parts, using four lines: two equally spaced horizontal lines, and two equally spaced vertical lines. It is common practice to place your chosen subject(s) on these lines, or at the intersections between horizontal and vertical lines. By doing so, you create more balanced, dynamic, and visually appealing photographs. Most of the pictures you will have seen throughout your life are likely to have had this ‘rule’ of thinking applied when the photographer was creating them. You might find that you already subconsciously know about the rule of thirds when you begin creating your own photographs.

When photographing a traditional landscape or seascape, which encompasses both land and sky, it is recommended that you include two-thirds land or two-thirds sky. You can visualise this grid to help you in the early stages of your photographic journey. Most modern cameras even have a setting that makes this grid visible in the viewfinder or on the LCD screen. I recommend enabling this to aid your development, especially in the early stages.

Leading Lines in Landscape Photography
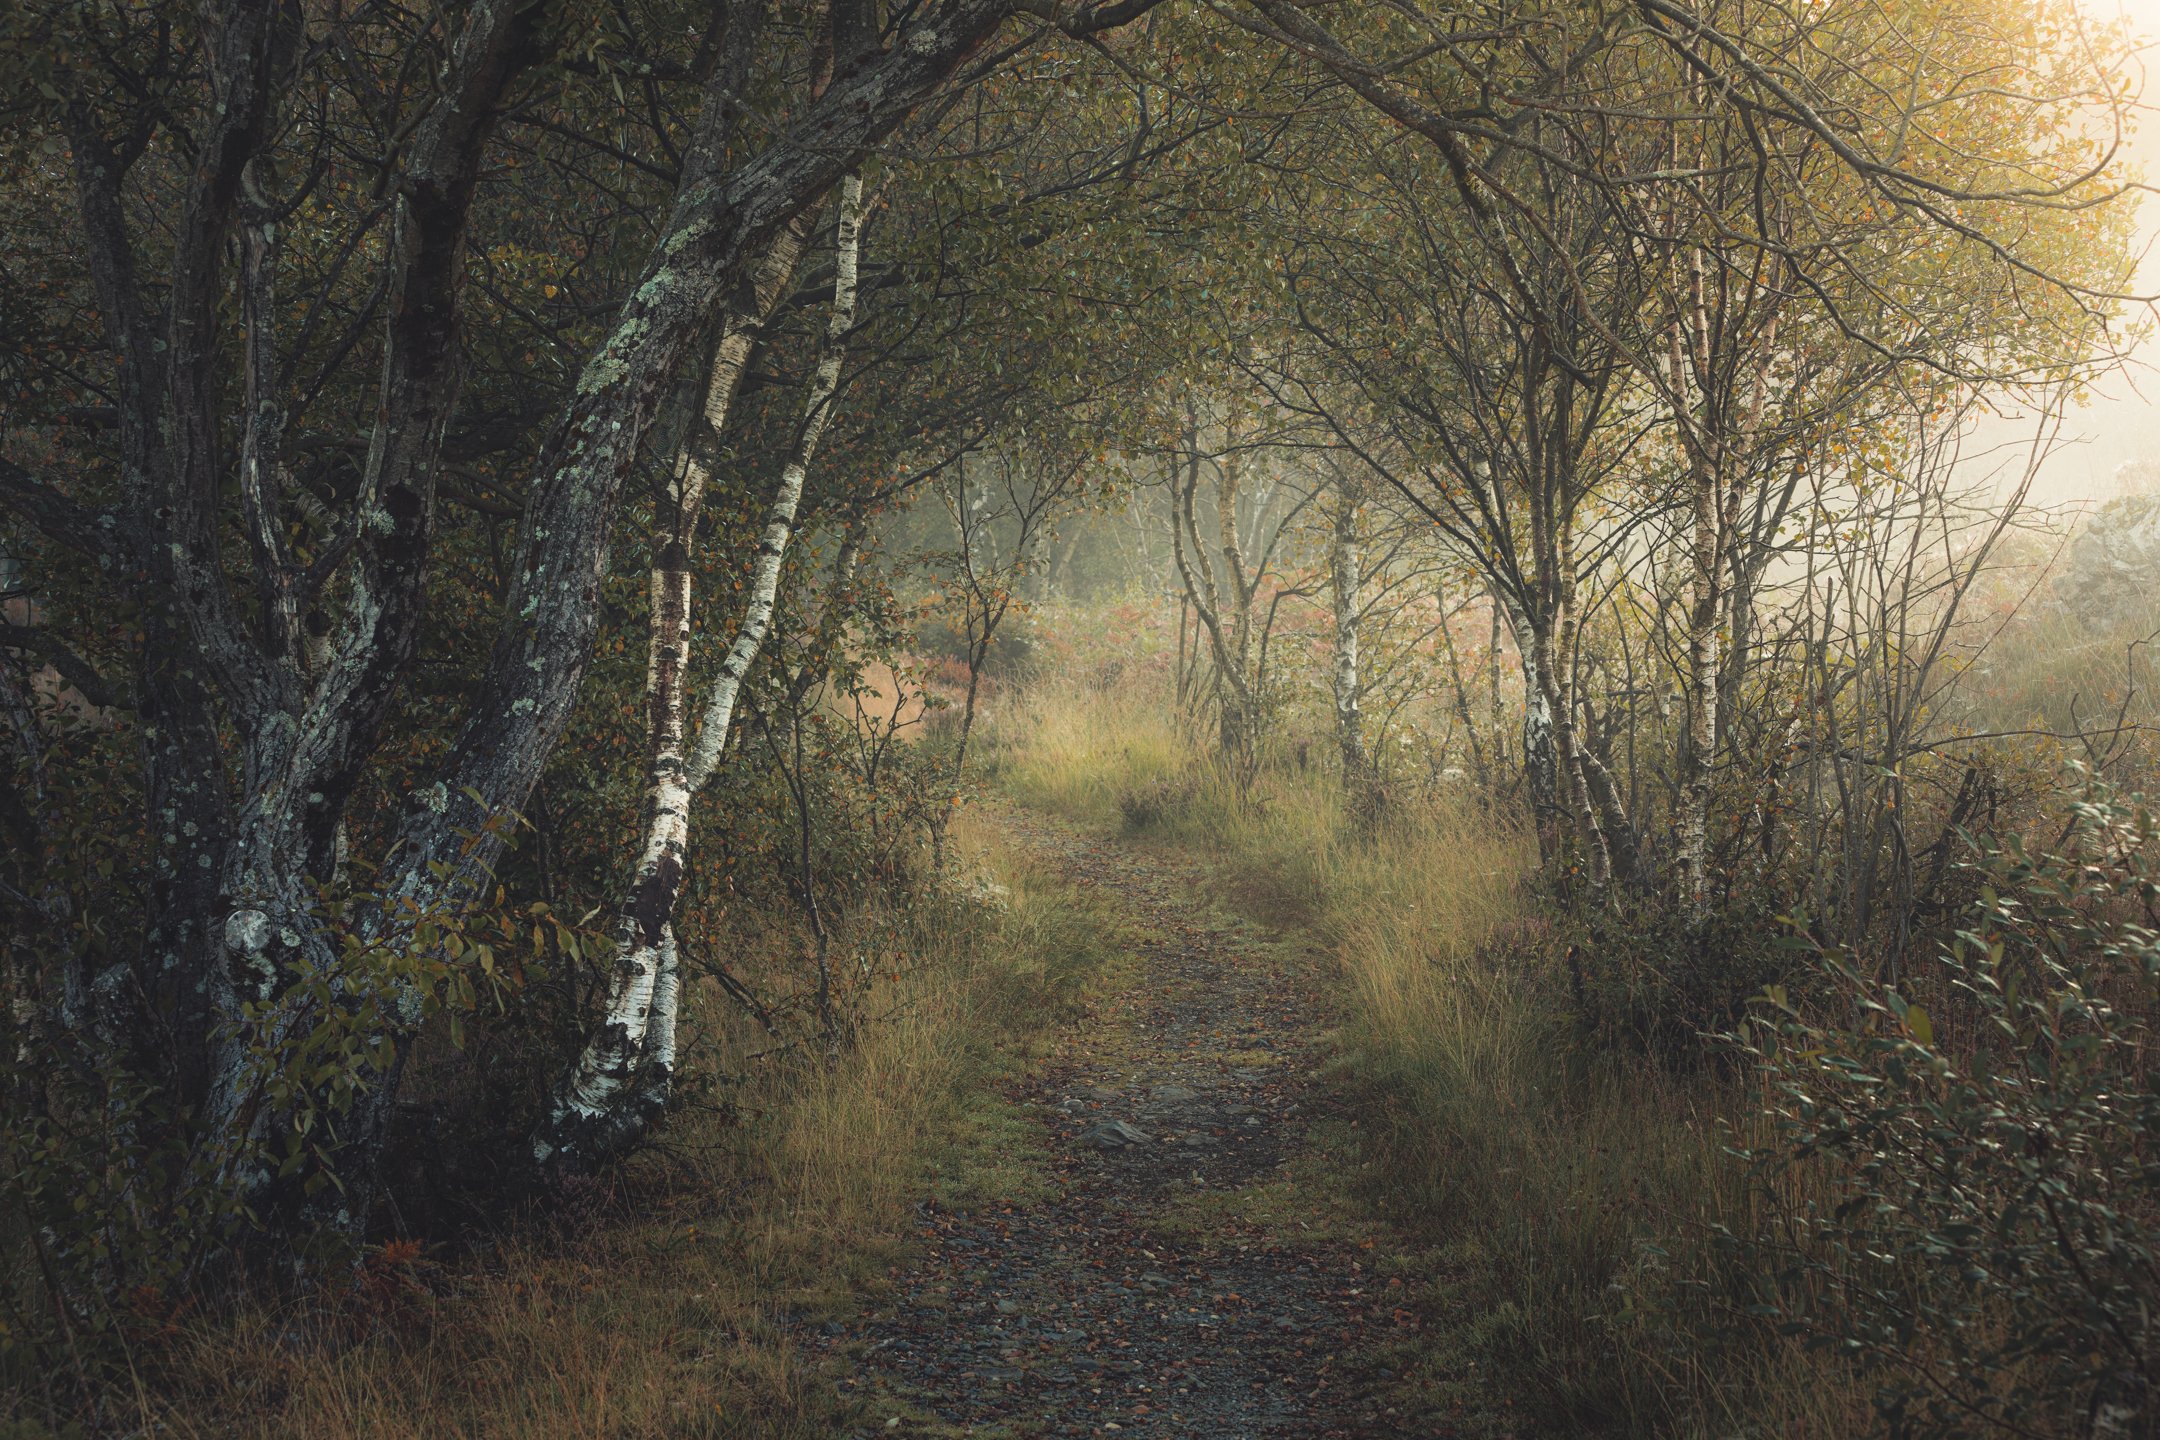
Leading lines in landscape photography can be anything that helps to create a journey through your photograph. These can be anything from rivers to rock formations to ridges to clouds in the sky. In the following case, the path helps to guide the viewer’s eyes through the scene, adding depth and, perhaps, allowing them to visualise walking through the mystical woodland for themselves.
In the case below, I have included diagonal lines that help to create movement through the frame. These leading lines can be powerful in landscape photography, as the alternating directions of movement can add some visual tension and dynamism to a picture. They guide the viewer from side to side, whilst moving through the frame front to back simultaneously.
The next kind of leading line is called the ‘S-Curve’, and makes for some of the more visually pleasing photographs. In many traditional landscape photographs, you will see the inclusion of the S-Curve, which leads to a point of focus — in this case, the lighthouse, which I have intentionally placed at the intersection of my thirds (see point one).
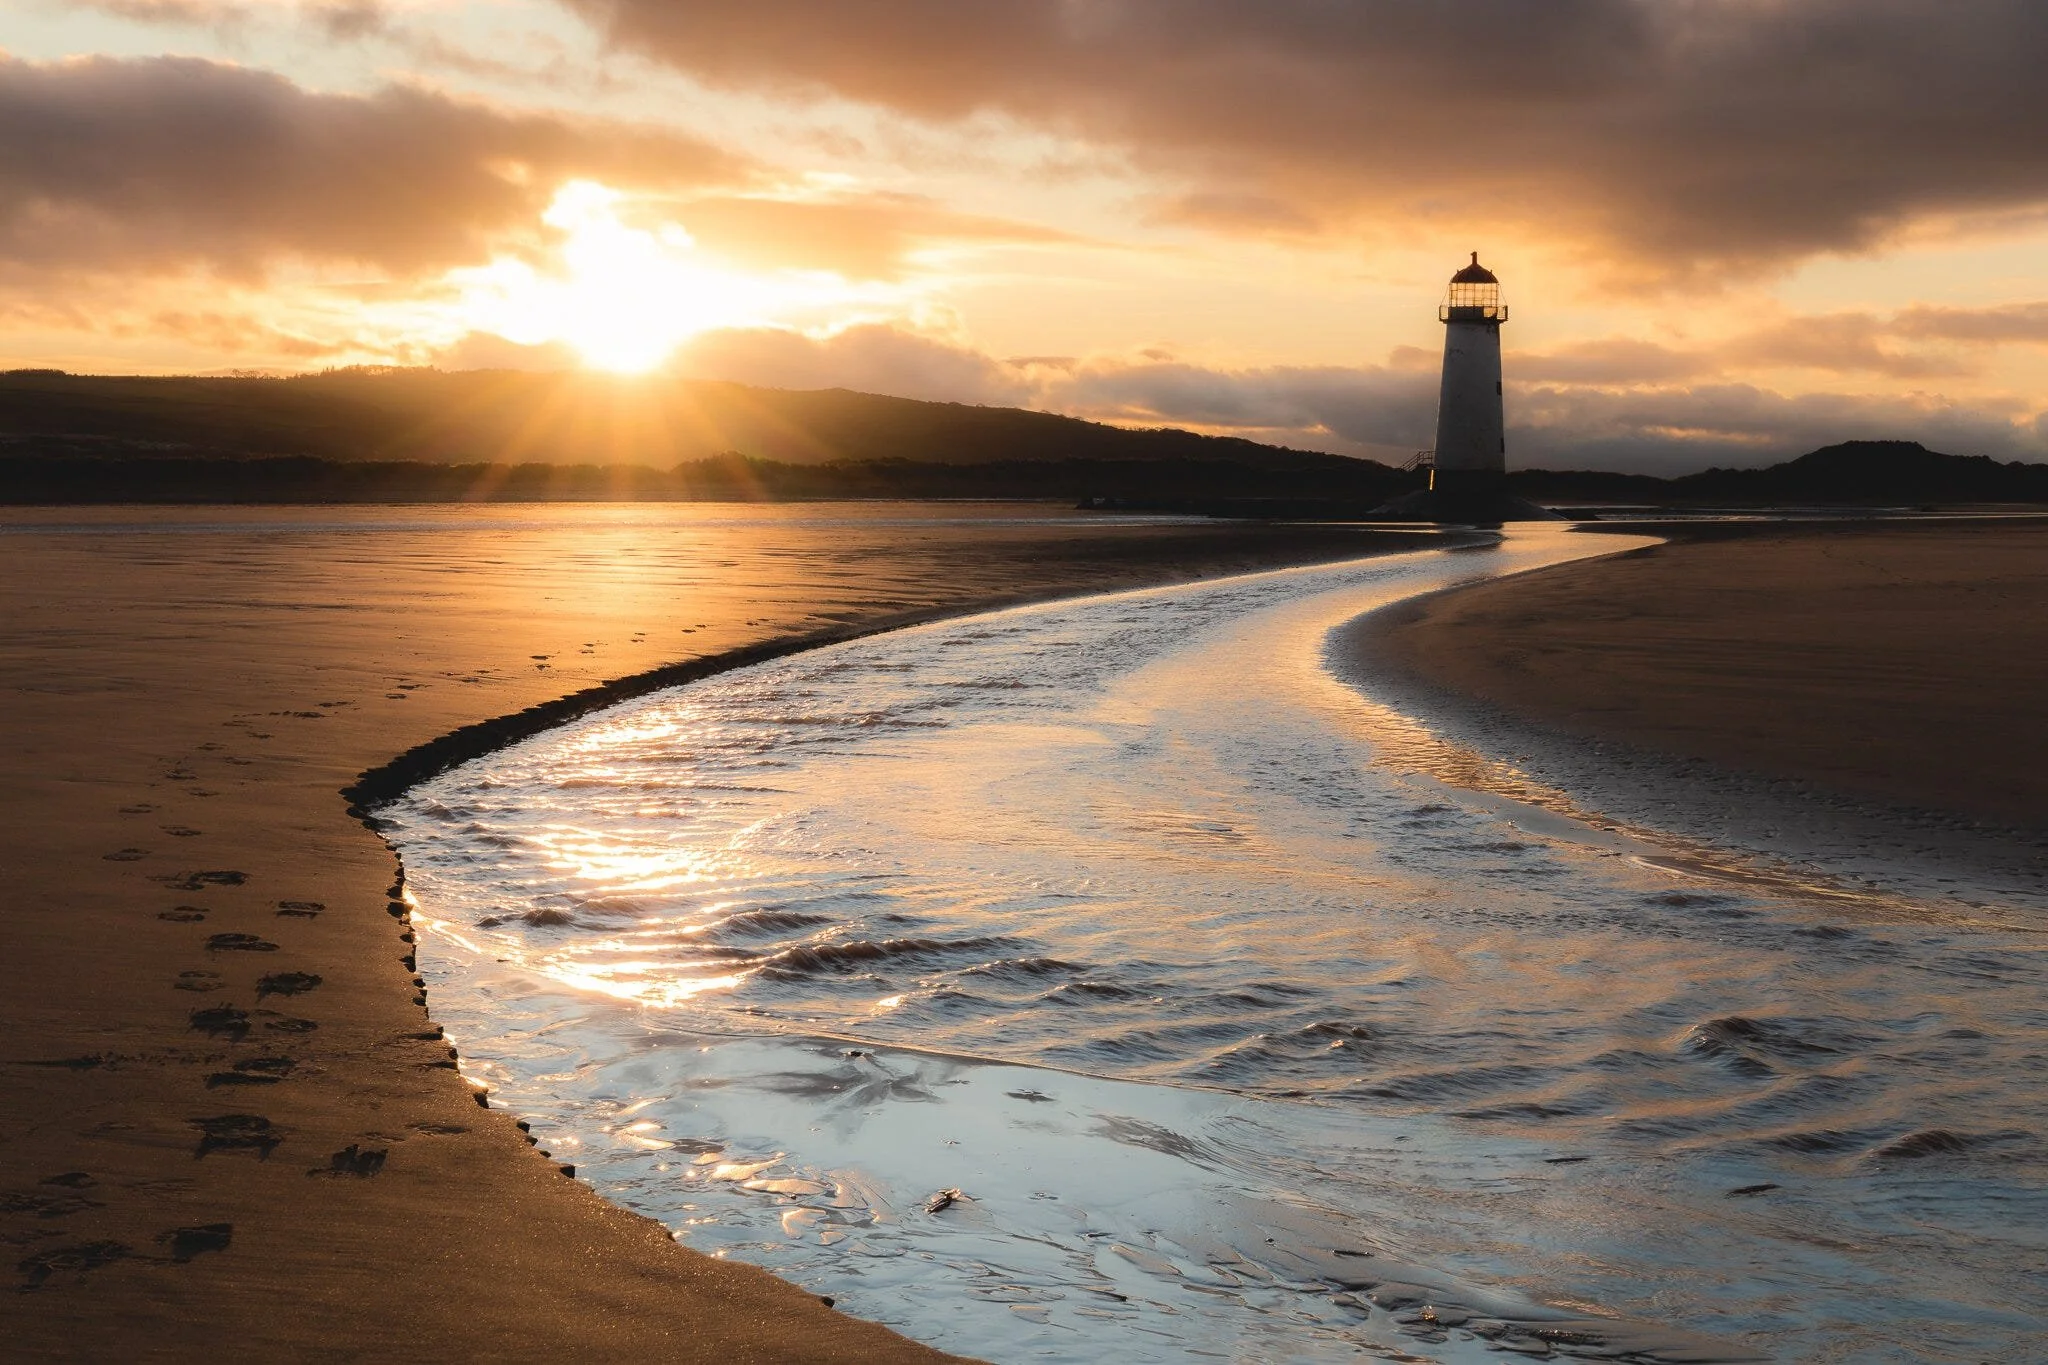
This simple composition technique can add depth, gentle flow, visual rhythm, structure, and can even invoke emotions in the viewer. The S-Curve helps a viewer to feel more immersed in a scene, enhancing their emotional connection with the landscape. This kind of leading line can transform a simple, mundane scene into a captivating landscape photograph.
PHOTO CHALLENGE: Go outdoors and look for S-Curves. Once you have seen one, you will begin to see them everywhere. You can even find them on a beach, in the mountains, and in simple subjects like plants and even the human face.
Framing Subjects in Your Photographs
Framing is another important compositional tool in landscape photography. Seeing your subject through a frame is a powerful way to draw your viewers’ eyes towards what is most important in your photograph. Landscape photographers can be creative when choosing frames, using many things to frame a subject, including flowers, trees, branches, grass, foliage, and rocks. There really are no limitations but your own imagination in landscape photography.

When choosing a frame, be careful not to choose something too bright or overpowering in size. The frame should give power to the chosen subject and not take the viewer’s attention away from it. The human eye naturally gravitates towards the sharpest part of a photograph, so you should also ensure that your camera is properly focused on the subject and not on the frame or surrounding area. It is a horrible feeling when you get back to the computer and load up your image with enthusiasm, only to find that your focus was set on the frame and not on the main subject.

By clever inclusion of frames within our photographs, we can add greater depth to our creations by making a photograph appear more three-dimensional. This can help our viewer to visualise standing in the scene for themselves, increasing their emotional engagement and making them feel as though they are completely immersed in the landscape. As photographers, we want to keep a viewer’s attention for as long as possible, and creating ‘depth’ is one of the main ways to do this.
Creating Depth in Landscape Photography
Leading on perfectly to my next point, depth is crucial in creating a powerful landscape photograph. You can create depth in many ways, some of which I have written about above. Here are the main ways to create depth in your photography: by including foreground, midground, and background, using leading lines, by overlapping layers, with clever use of aperture (f-number), contrasting colours and tones, and utlising available light.
Foreground, Midground, Background
By including foreground, midground, and background in our photographs, we can add perspective and, therefore, increase the depth within our photographs. The viewer becomes a part of the journey through the scene. Photographs are, of course, two-dimensional in print. It is important, therefore, that we focus on creating three-dimensionality in our creations with different layers in our photographs.
Depth of Field
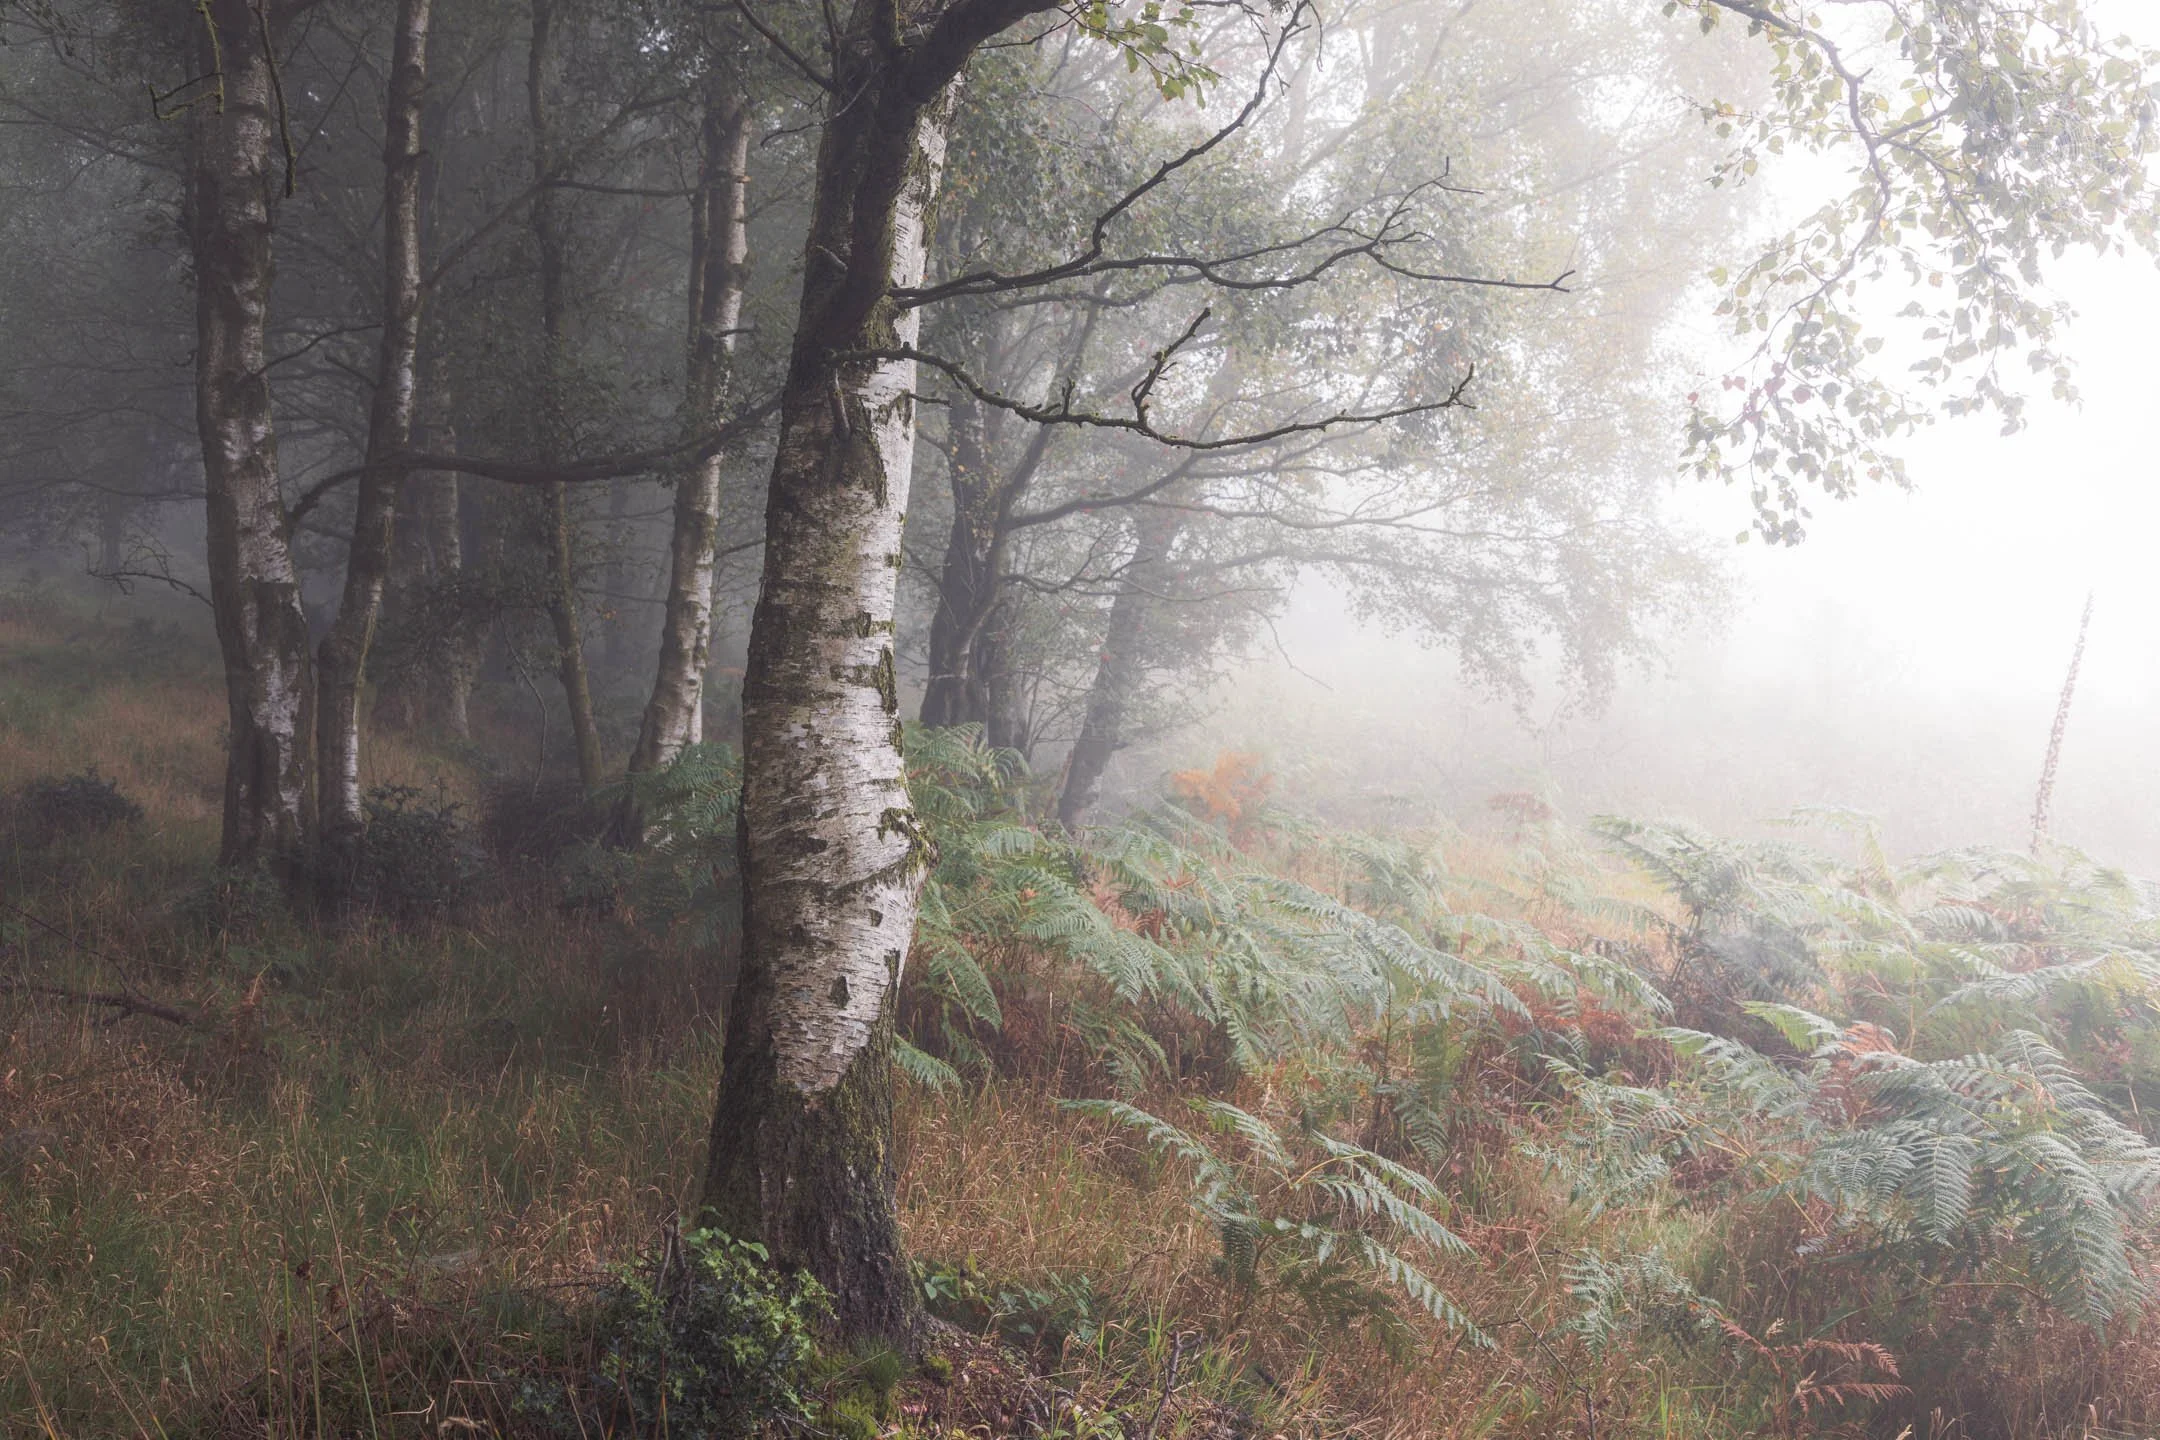
By using a larger aperture (smaller ‘f-number’, like f/5.6 or f/8), we can ensure that we create a ‘softness’ to certain parts of the image. This is referred to as ‘out of focus’. In the example below, I focused on the foreground silver birch trees, meaning the background across the lake was thrown out of focus. This technique adds depth as well as mystery and intrigue to the viewer, as their eyes spend more time trying to make sense of the landscape.
PRO TIP: Shoot during foggy and misty mornings for the ultimate atmospheric photographs that contain real depth and mystery.

Contrasting Colour Tones & Use of Available Light
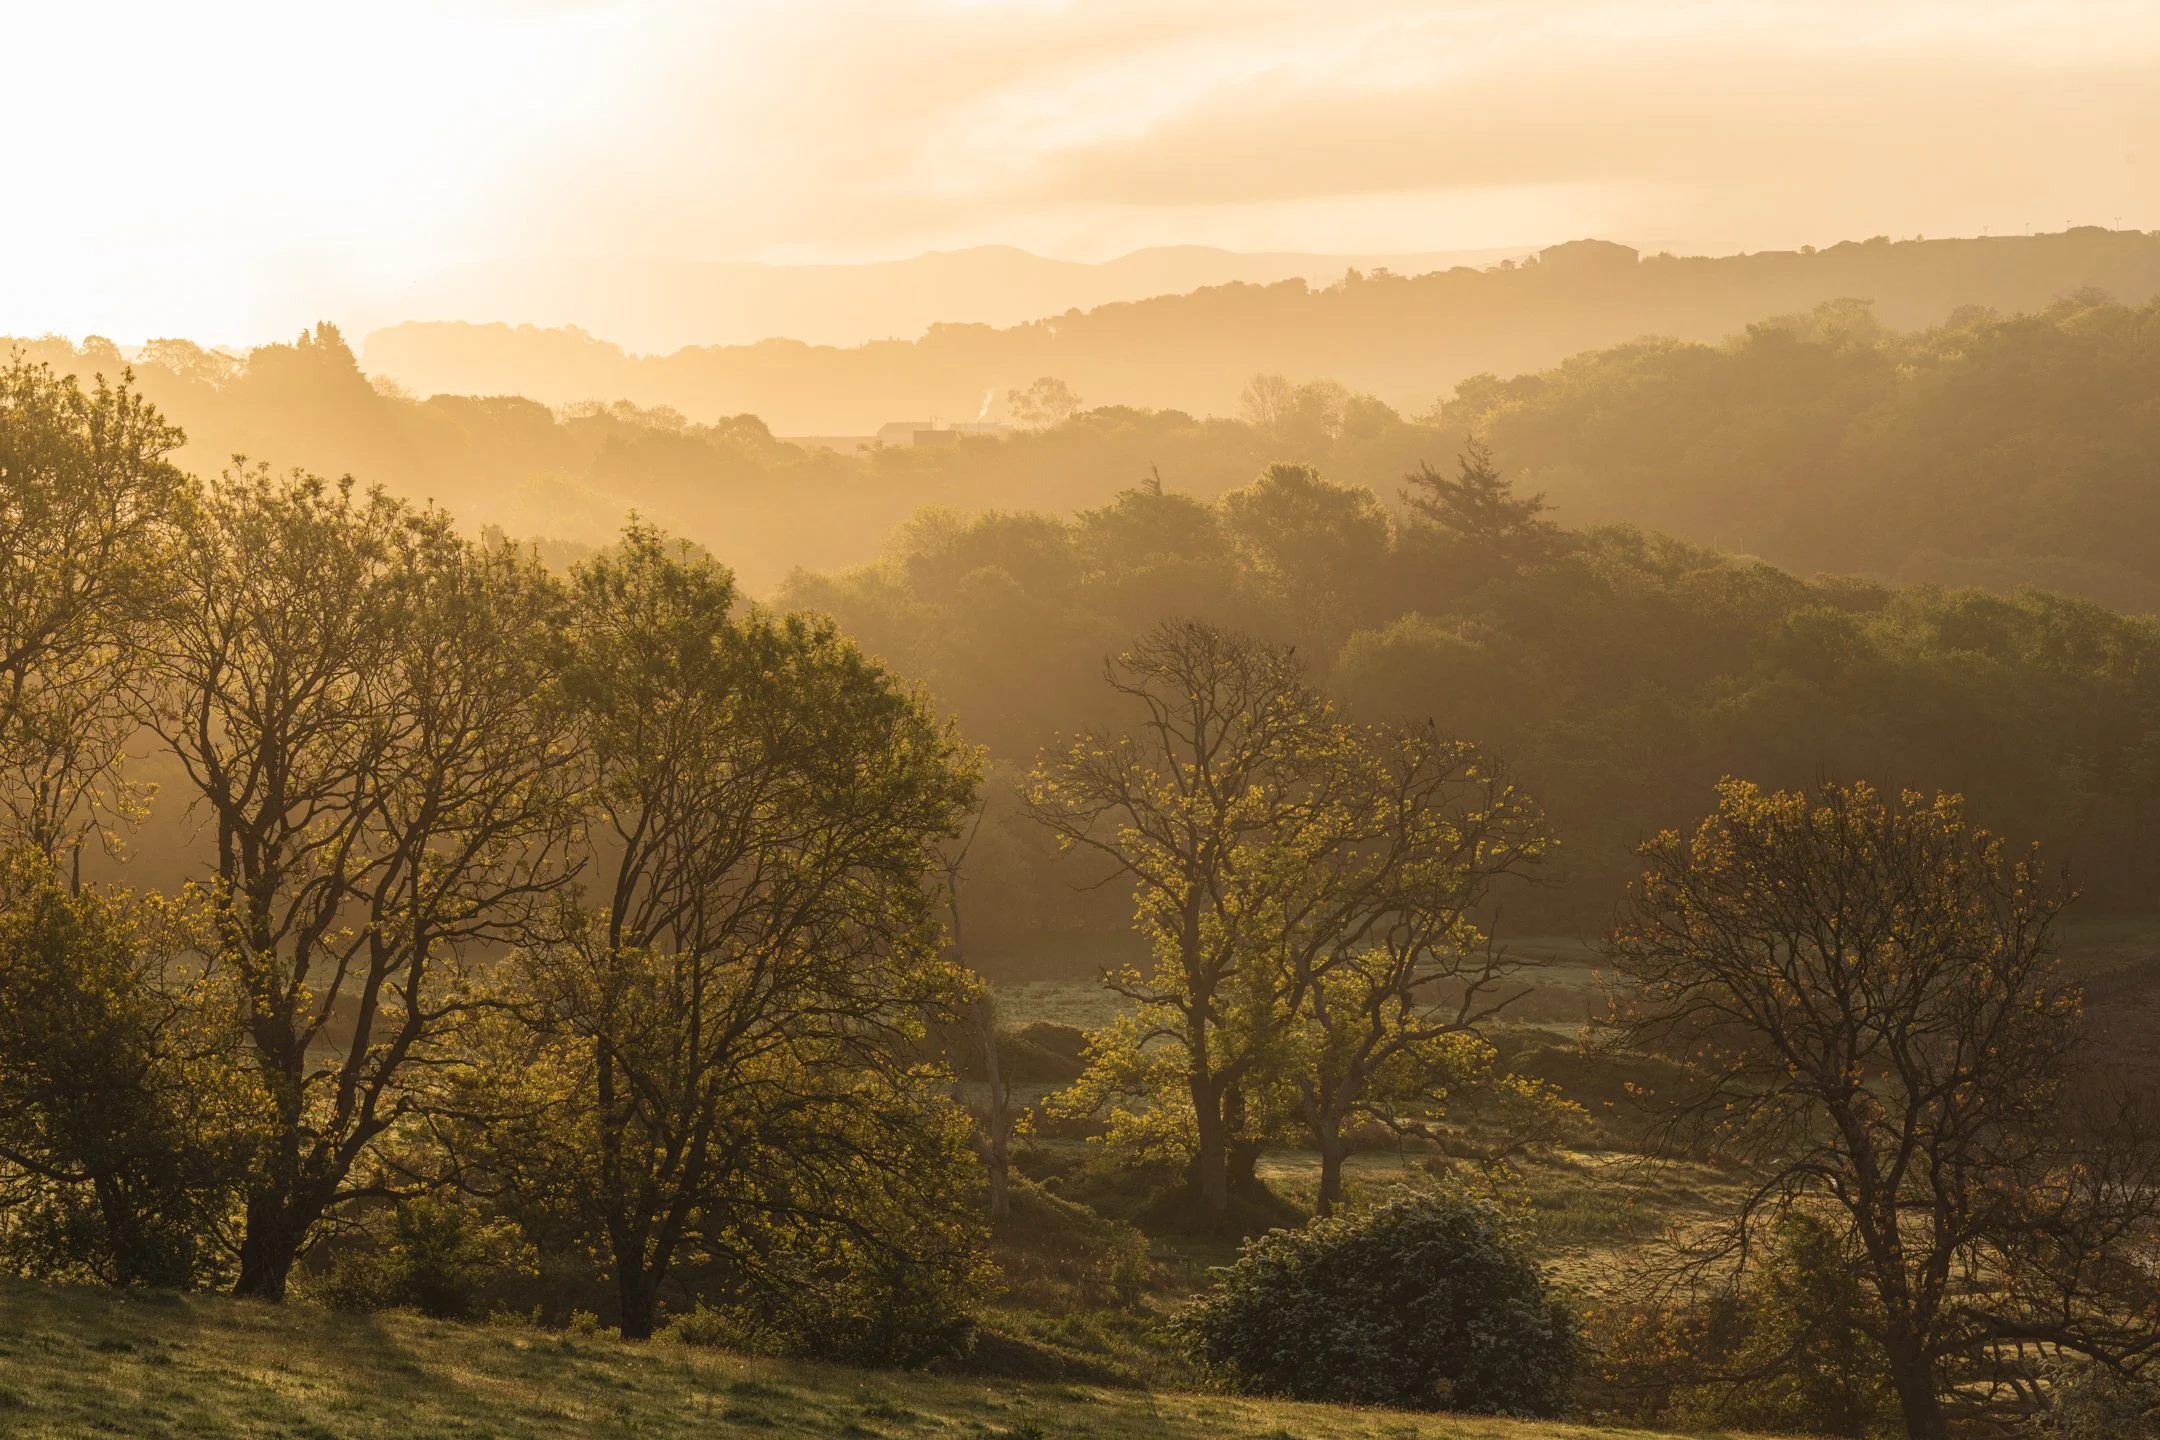
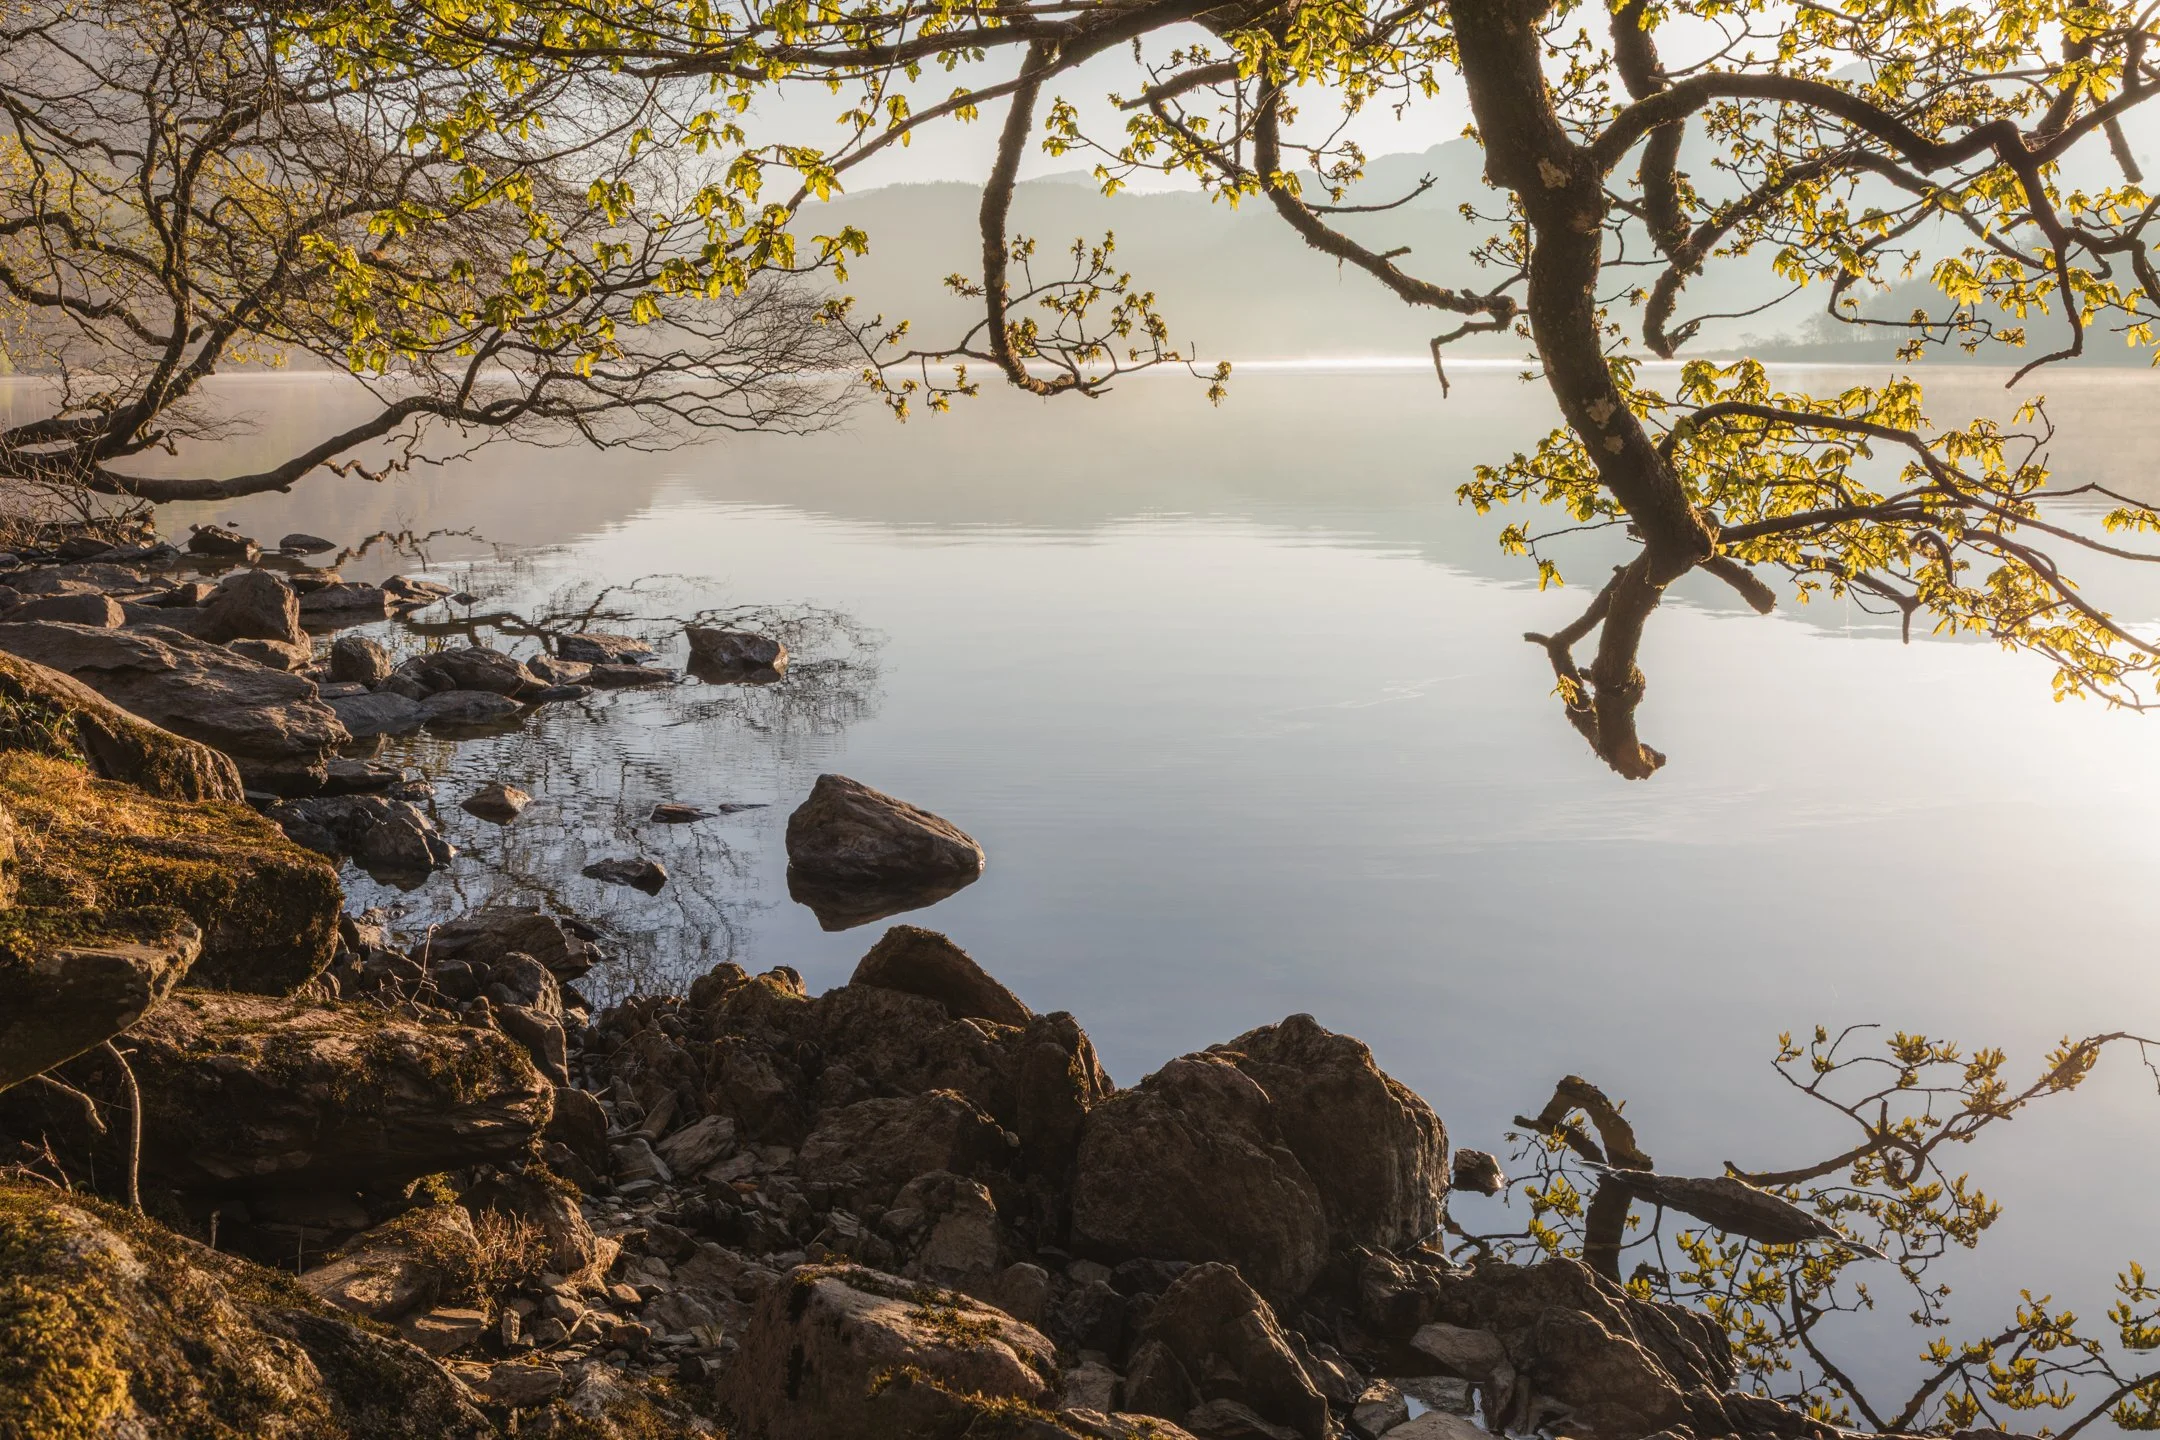
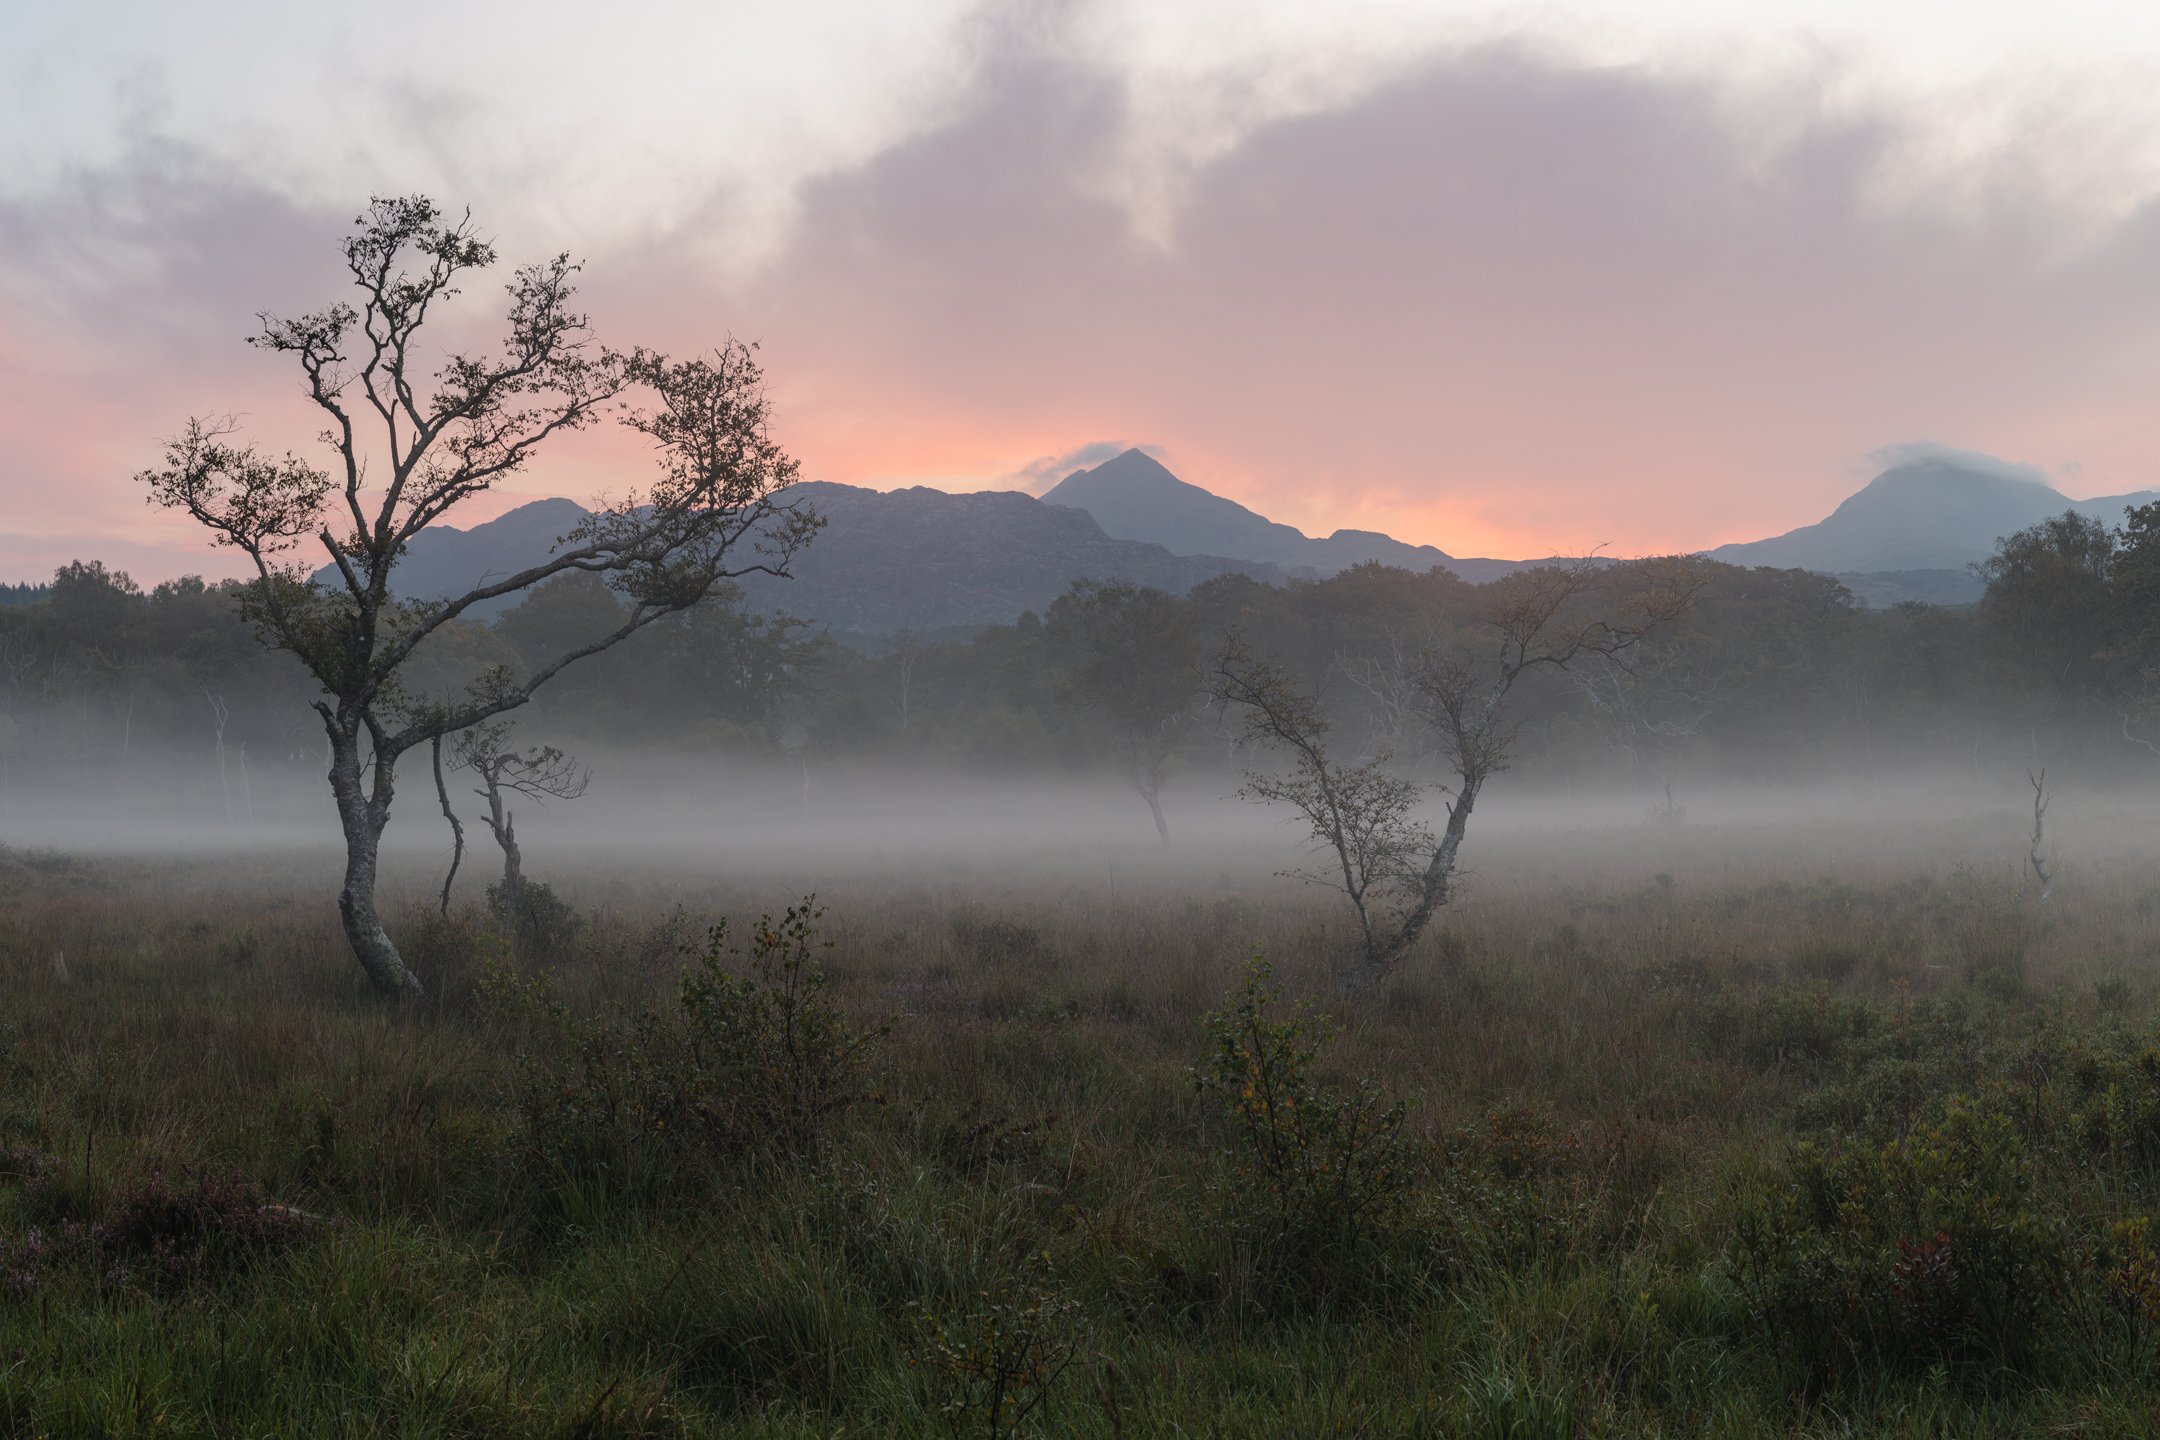
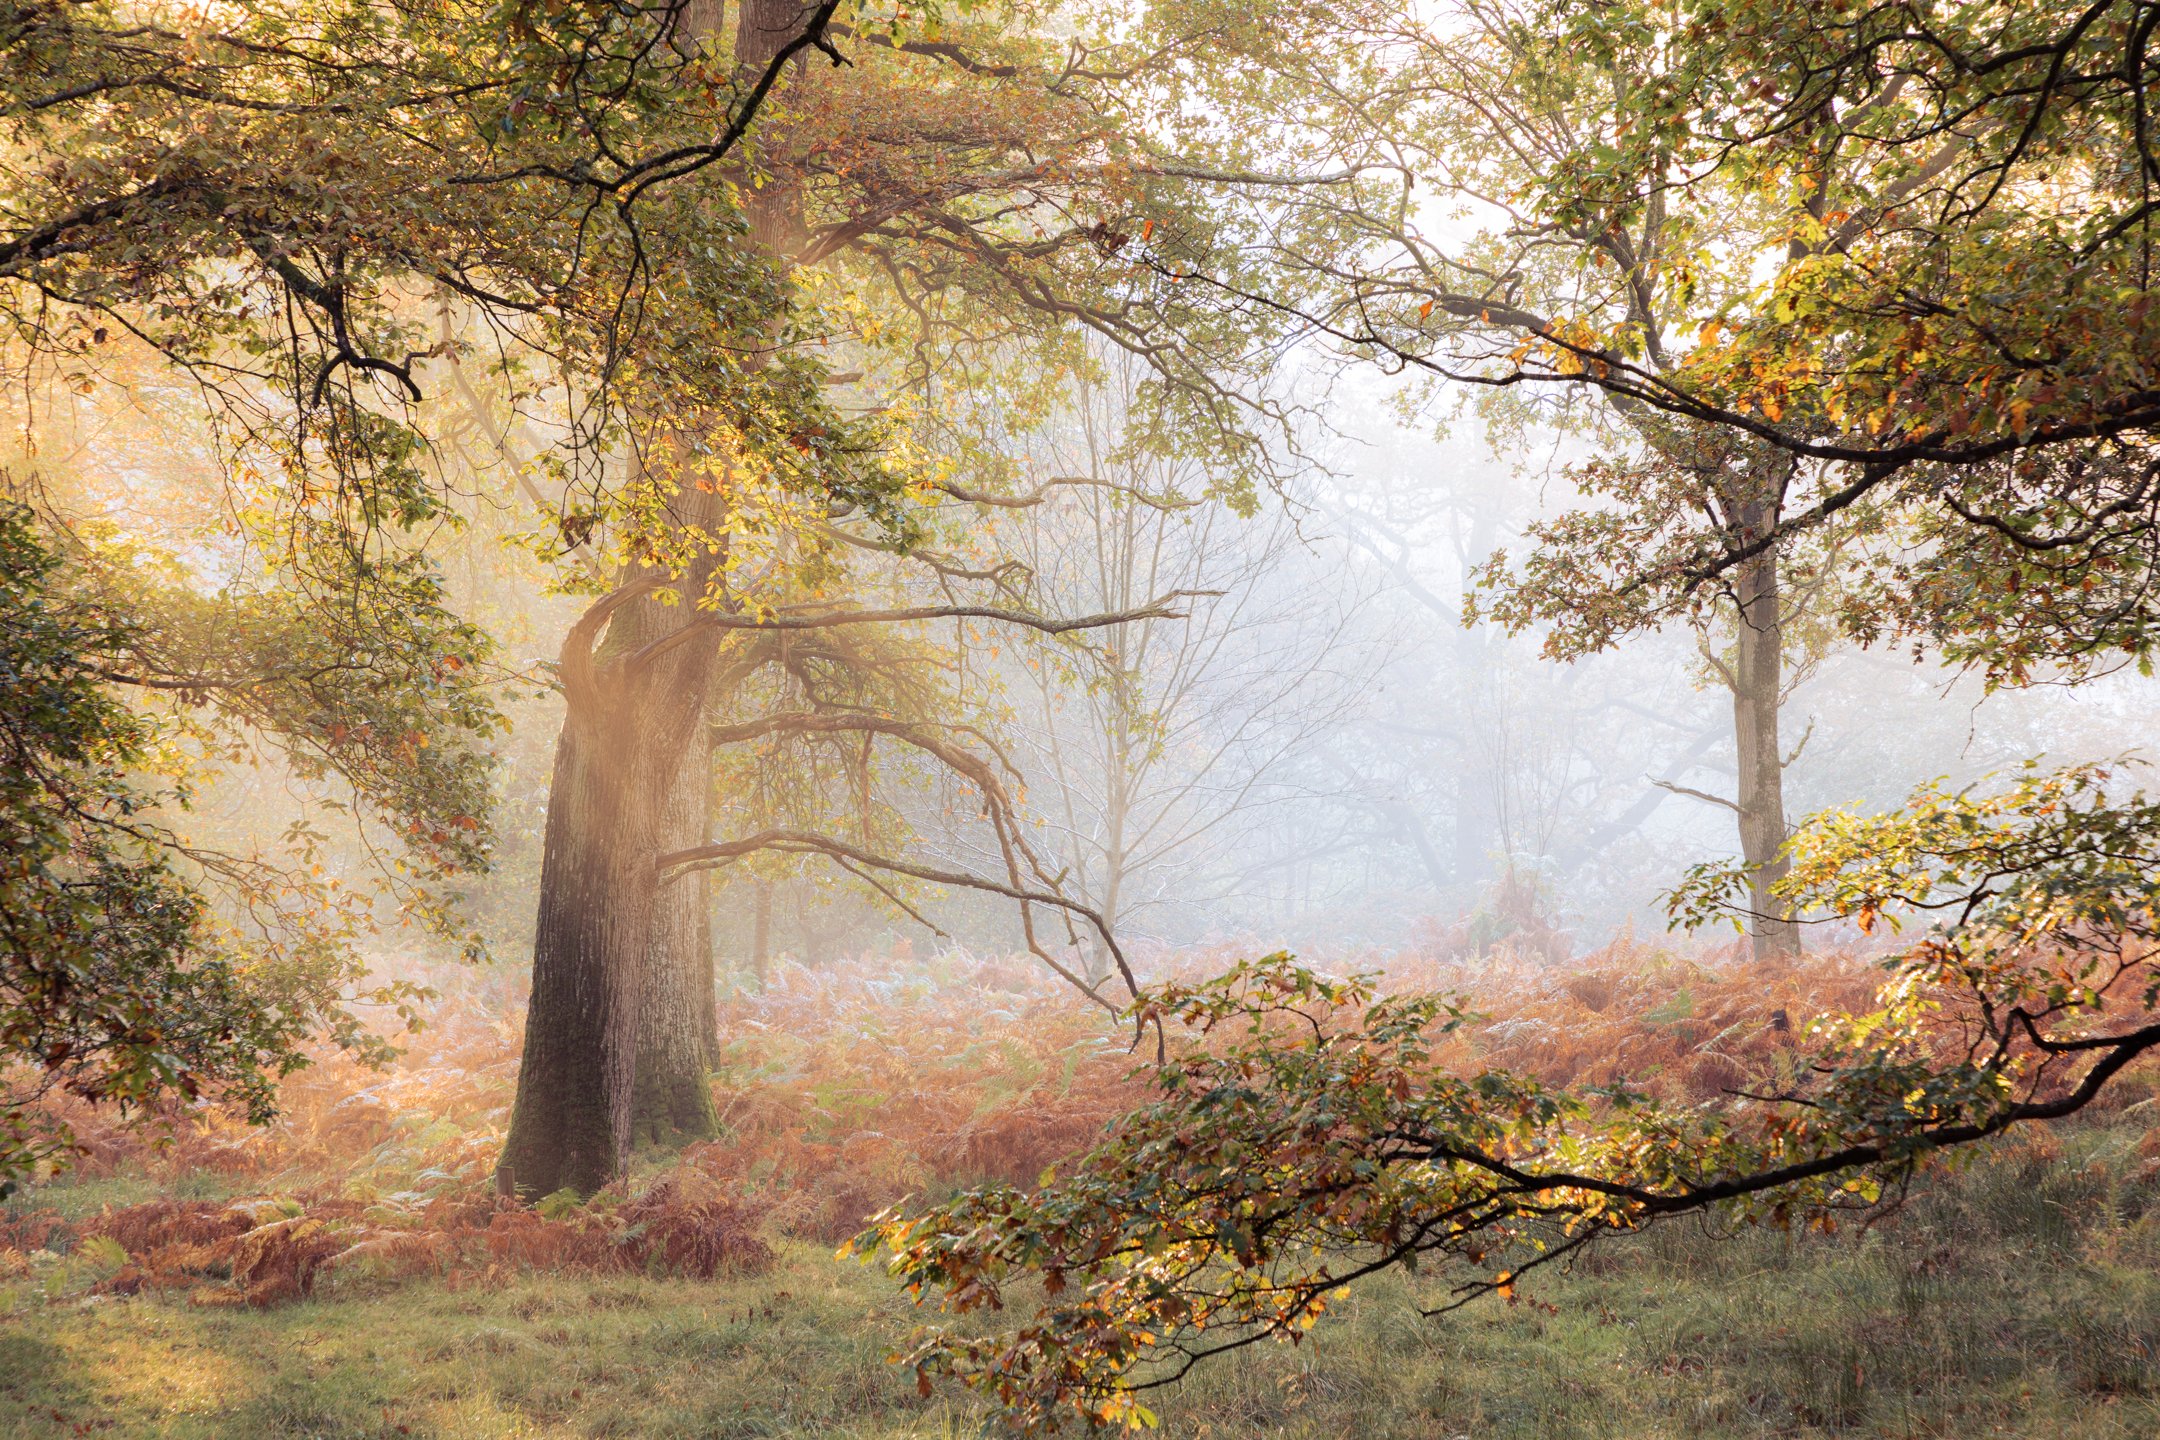
By photographing during seasons of transition, we can create beautiful gradations of colour throughout our photographs. My favourite times to photograph are during the autumn and winter months, when the mornings are cold, the grass is frosty, and the golden sunlight burns through the fog. You can see why in the two photographs below, both of which are perfect examples of how to create depth with both colour and light.

By adopting this ‘shooting into the light’ technique, I have managed to create depth and atmosphere during the beautiful, silent hours of morning. You’re learning a lot about composition in this article. The next thing you need to master is light.
FURTHER LEARNING: If you want to learn more about light, I recommend heading over to read the first of a three-part blog series about understanding light in landscape photography.
Visual Balance, Harmony & Symmetry

Balance is important in landscape photography, just like with anything in life. Without getting too philosophical (I’ll save that for my other publication, A Photographer’s Journal), you will want to make sure that you create photographs that are well balanced throughout for the viewer’s ease. A poorly balanced photograph can make for very uncomfortable viewing.
Note: When talking about balance in photography, I am referring to the balance of visual weight (subjects within a frame) as well as the balance of light & shadow.
In the first case, you will need to ensure that you balance your subjects within a frame. In a woodland environment, for example, you should try to maintain similar distances between the trunks of trees in most cases where possible, and similar-sized gaps at either edge of the frame. Trees that are too close together can add uncomfortable tension and can add ‘visual weight’ that draws the eyes towards them and away from the intended journey.
This was an approach I undertook in the example below when creating this photograph of a mystical silver birch woodland. Subtle movements of the tripod, left and right, as well as up and down, were necessary as I was intentional about which trees to place where within the frame. I wanted to create balance and symmetry, so I had a harmonious photograph. You might also notice that the background trees have been framed by some of the foreground trees. Again, this was all a part of my intention when composing this photograph. By framing the trees in this way, I added a sense of depth to my photograph, bringing it to life and allowing a viewer to feel like they are a part of it.

PRO TIP: Intention is something I talk passionately about in workshops and during one-to-one tuition sessions. It is important to apply intention to each photograph. Think: What do I want to include? What do I want to exclude? Is there anything in this frame that is distracting from the story I wish to tell? Am I clear on the story that I wish to tell?
A well-balanced landscape photograph will include a pleasing amount of highlights and shadows. It is important not to neglect one or the other in your pursuit of meaningful photographs. How a photographer uses light, however, is completely subjective. For some people, they may wish to eliminate shadows and focus on bright, beautiful sunsets. Others, however, might wish to photograph more dark and melancholic scenes to invoke certain feelings in their viewer. There are no rights and wrongs in photography, and how you choose to use light is up to you.
FURTHER LEARNING: If you want to learn more about light, I recommend heading over to read the earlier referenced, three-part series all about light. You can read that next.
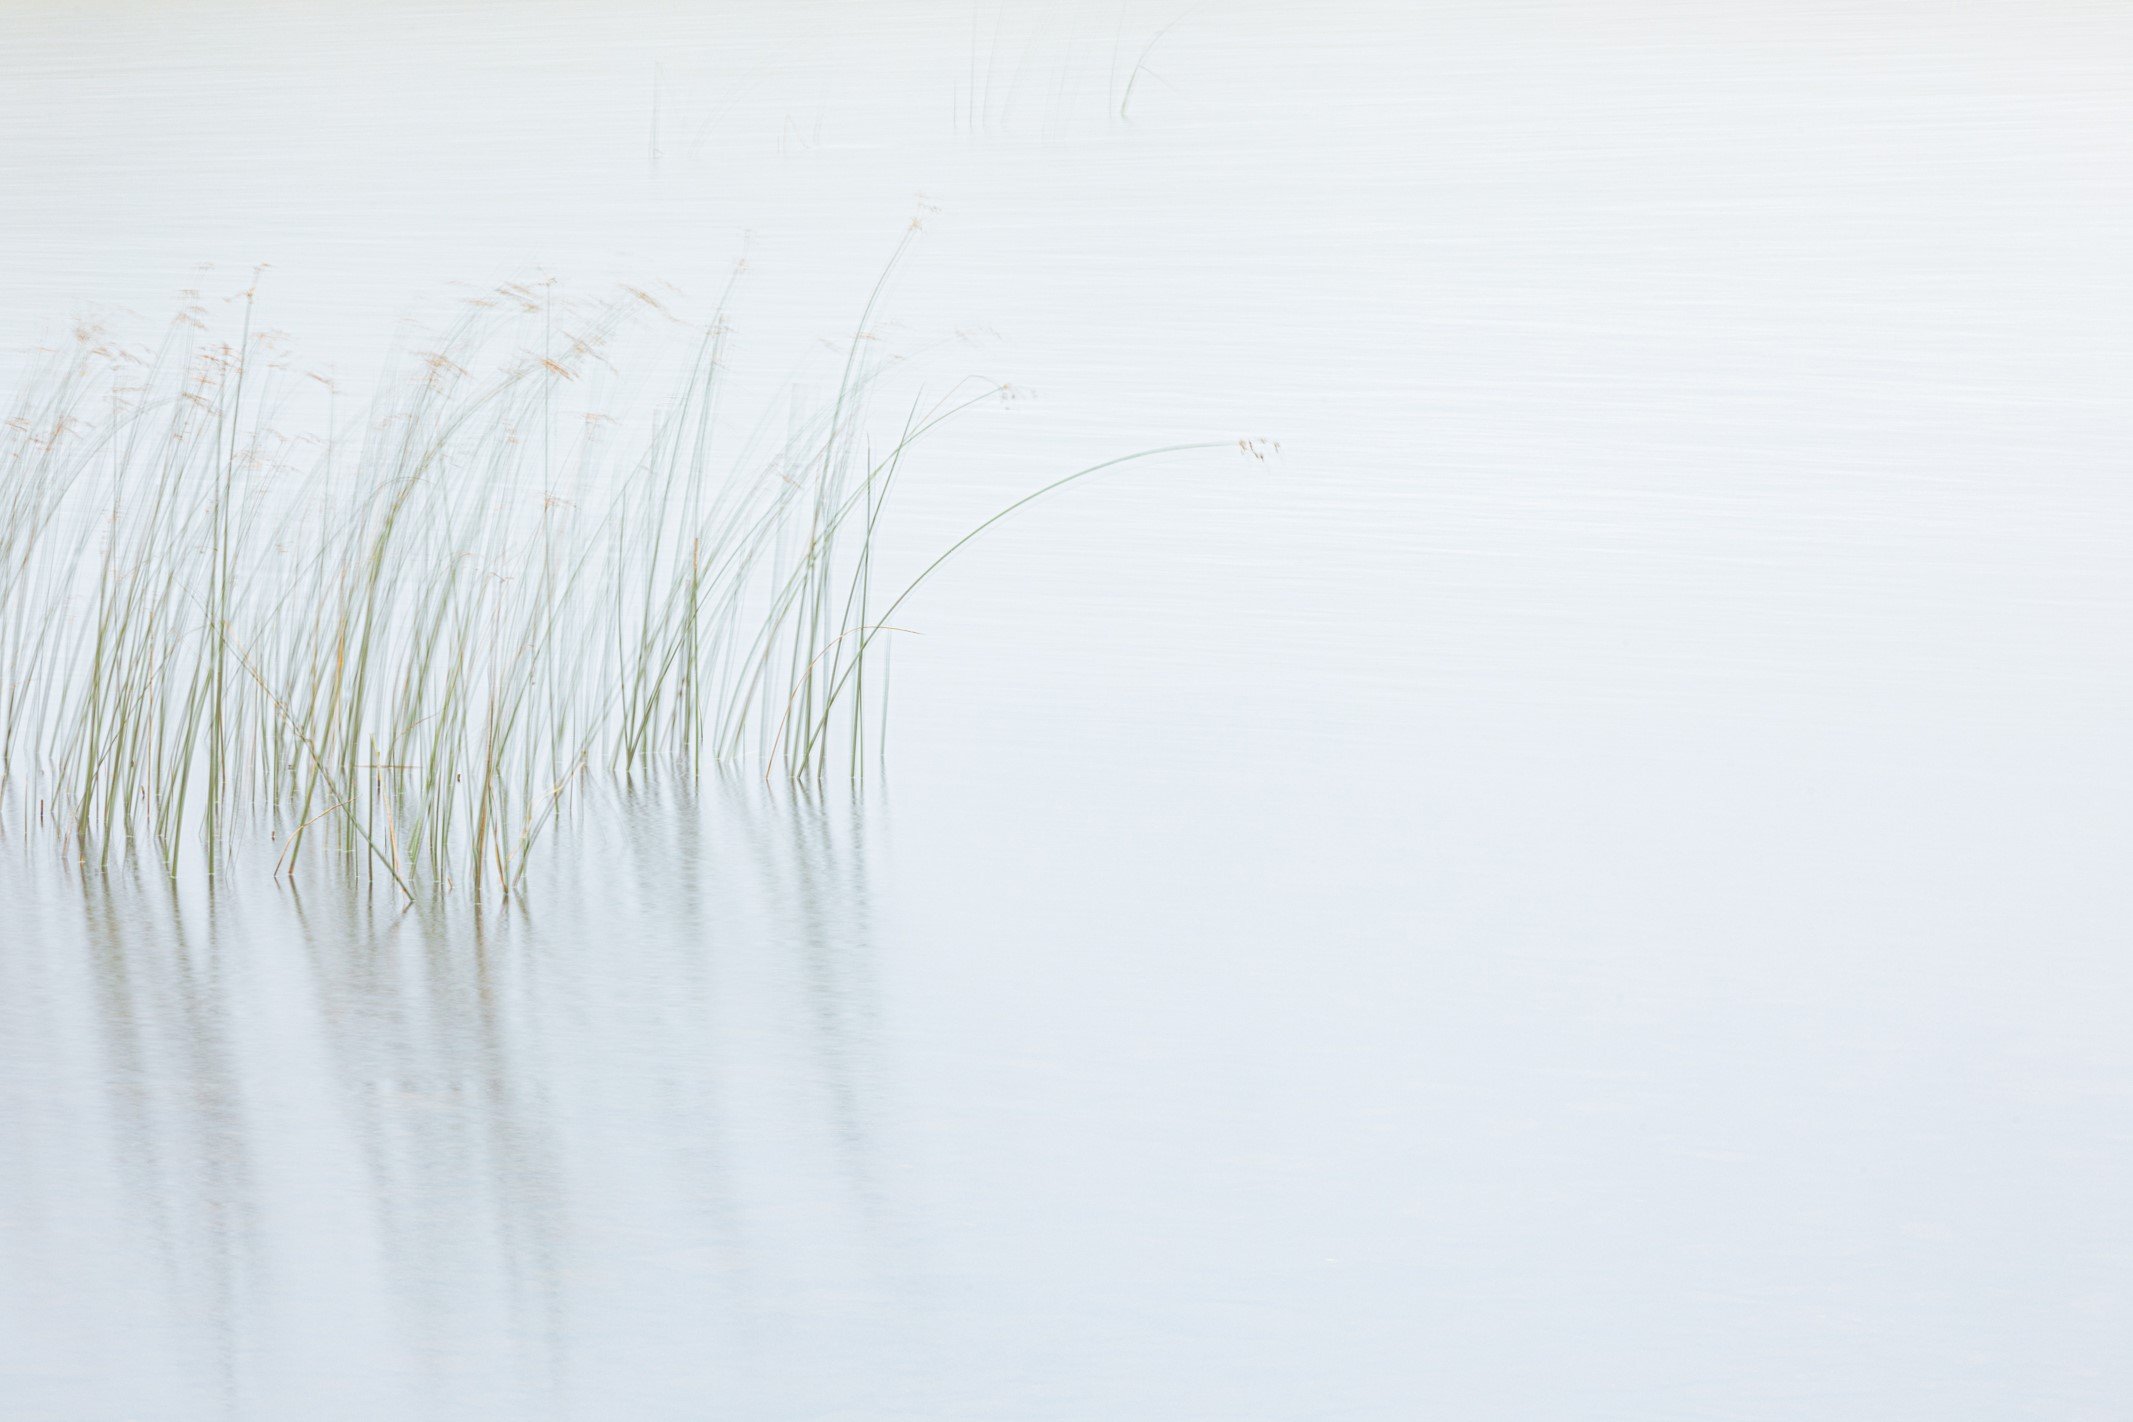
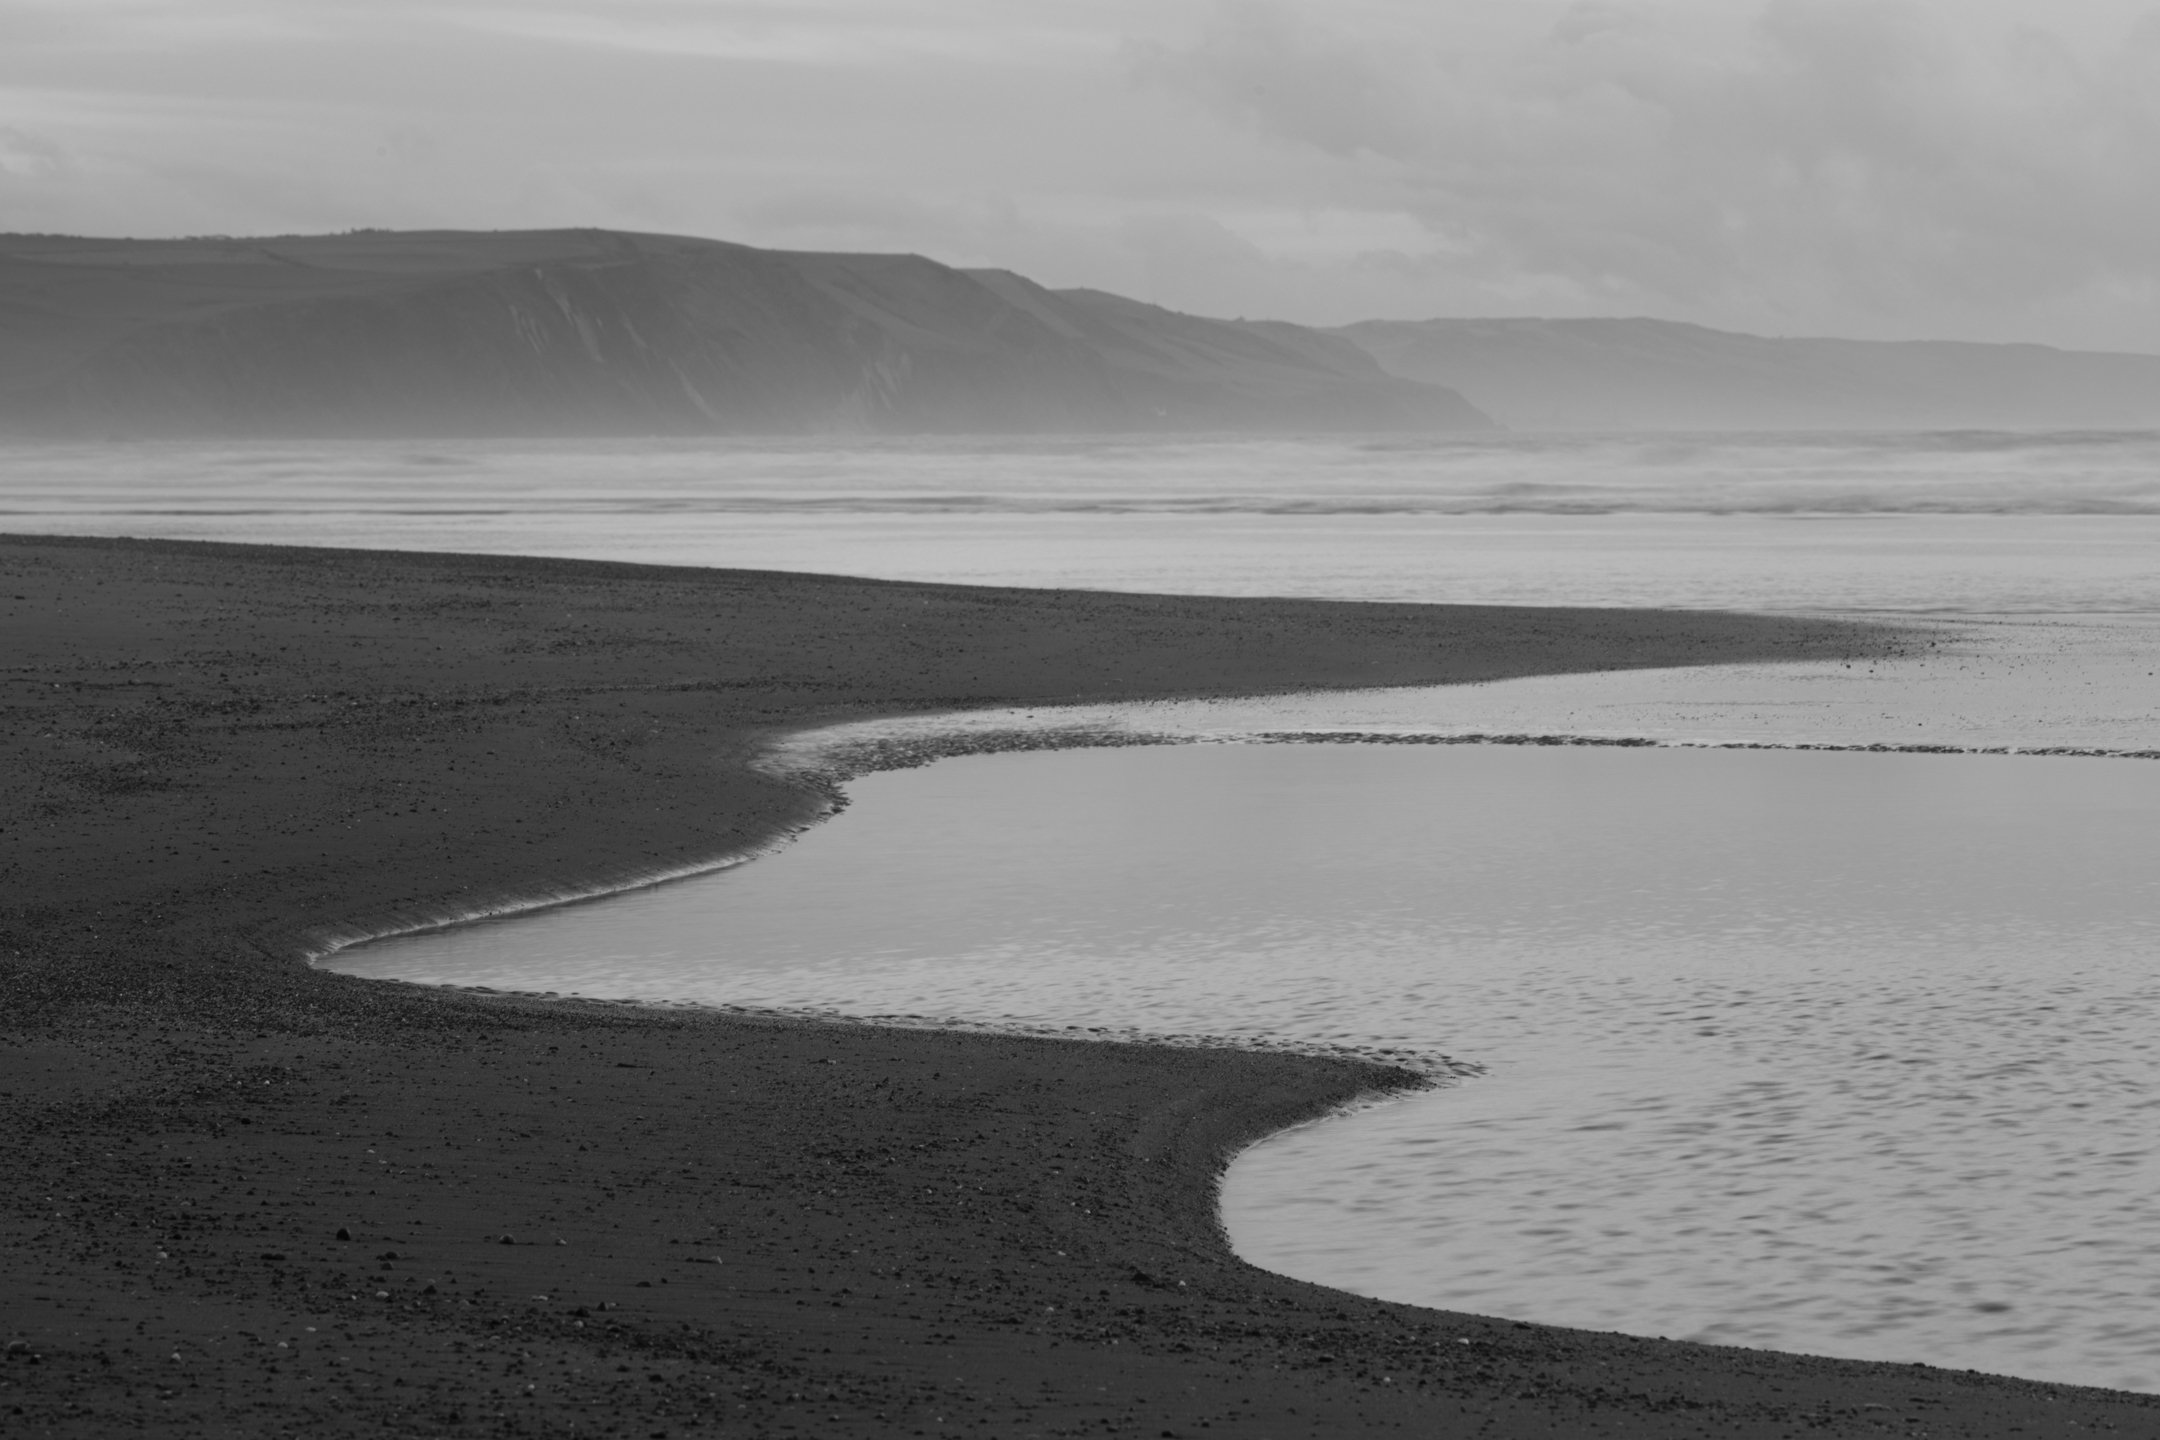
Contrary to the point I made above about balance and symmetry, here is a photograph that might appear to be ‘off-balance’ because there isn’t an even spread of subjects across the frame. Instead, there is a lot of ‘negative space’. ‘Negative space’ is a term used to describe the space around a subject in a photograph. There is a lot of negative space in the image above, which is necessary due to the intended story that I was trying to tell. That is exactly why we must learn the rules of photography; so that we know exactly when to break them all and do things our way.
This photograph works because of the shape of the reeds, which were being blown gently by the wind. The angle of the reeds portrays a sense of movement. When an object is moving, a powerful compositional technique is to offset it, leaving more negative space in the direction in which it is moving. In a similar composition below, the pampus grass was still that evening, and so I felt compelled to place it in the centre of the frame. This can be a good rule of thumb when starting on your journey to understand landscape photography composition: still subject = central placement; moving subject = offset to one side with more space in which to move. To reiterate: these aren’t fixed ‘rules’, and you will need to apply your judgment as to what works and what doesn’t.

Conclusion
The journey of the landscape photographer will take you from photographing with rules to photographing with freedom and intuition. In Ten Thousand Hours, I aim to equip you with the skills to master the technical side of photography so that you can lead with inspiration and intuition, photographing whatever and however your heart desires.
Rules are never too much fun to follow, but, in this case, I speak from experience when I say that learning them is an essential part of the photographic process. My journey has led me to a place where I am now creating photographs that hang on the walls of prestigious galleries and feature in magazines such as Outdoor Photography and On Landscape.
Yes, rules are meant to be broken, but first we must learn them so we know why we have them, when to break them, and how best to do it. I hope that this guide has been a great introduction to the rules of composition in landscape photography. If you’d like to learn more, scroll down to get your FREE landscape photography eBook, or click here for more practical and technical articles about the art of landscape photography.
Thank you for taking the time to read this article. If you’re looking for somewhere to share the results of your future creations, you might like to join the Finding Light Photography Community on Facebook. It is a closed, intimate group for like-minded, thoughtful photographers to share, learn, and ultimately grow. Occasionally, I share exclusive updates and links to articles and events that you might also find useful.
If you would like to receive further practical and technical articles like this directly to your email inbox, consider signing up for my newsletter. I send out monthly emails with links to new writings, events, workshops, and things I have found inspiring that month.
I’m Brad Carr, and here in Ten Thousand Hours, I share practical and technical articles to help you improve your landscape and nature photography. I also organise group workshops, creative retreats, and am available for private one-to-one photography tuition as well as online and in-person creative mentoring.